Wishing you and yours a happy, fun-filled, and safe holiday!
|
|
Wishing you and yours a happy, fun-filled, and safe holiday!
0 Comments
I've been meaning to do a pants tutorial for weeks, and now that 5 is crawling (!) he is DEFINITELY going to need some new pants. I figure he'll probably retain the same mass, more or less, but it will probably be rearranging itself soon into some longer, slightly less marshmallow-y shapes. So! Pants! To make these pants, you will need: a long sleeve shirt (or two long sleeves of the exact same size) scissors sewing machine elastic 3/4" or 1", as long as your babe is around pins, if you like, I don't use them usually a big safety pin a pair of pants that fit properly around the waist and diaper (to use as a guide) Get Your Pieces Ready 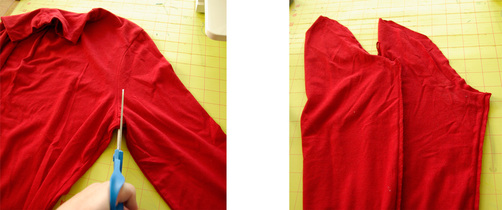 Cut off the sleeves of your long-sleeved shirt right where they attach to the shoulders. When you're done, they should look like the picture on the right. 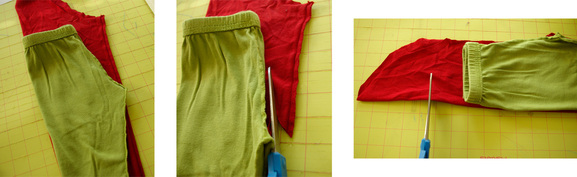 Lay your guide pants on top of one sleeve, with the sleeve seams on the same side as the guide pants crotch. It doesn't matter if the bottom part of the sleeve is bigger than your guide pants, we're just using them to get the crotch area right. Make sure there is about two inches of fabric to spare above the waist of the guide pants- you'll need it to make the casing for the elastic. Once you're all lined up, cut the sleeve along the seam that goes from the crotch to the waist of the guide pants and continue up in a straight line once you reach the waist. Leaving the guide pants where they are, cut the sleeve approx two inches above the waist of the guide pants. Better to have more room for the diaper than less... 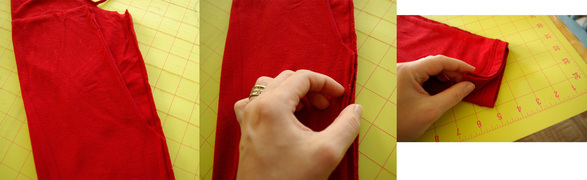 When the first sleeve is ready to go, lay it on top of the second sleeve, both sleeves inside out, seams on the same side (I have them here on the right). MAKE SURE that the cuffs at the bottom are perfectly lined up and that the seams are really matched up- you don't want one leg longer than the other! Make the same two cuts to the second sleeve as you did to the first, using the first as your guide. 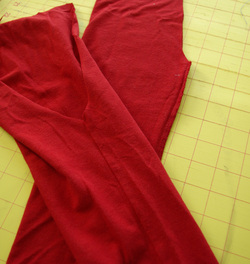 You should now have two pieces that look like this. Give Those Pants Some Legs to Stand on! 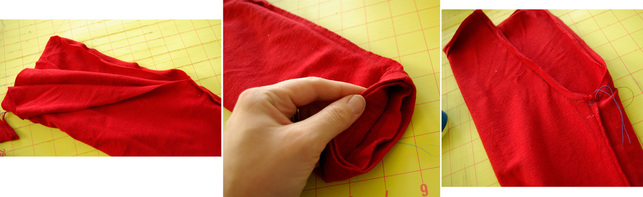 Now, turn one of your sleeves right side out. Stuff it inside the other sleeve, lining up the cuffs and the existing seam. Take this little sleeve bundle to your sewing machine and sew along the U-shaped line that will make the crotch of your new pants. I like to start at the center and sew to the waist, so I can make sure the two existing seams line up perfectly. 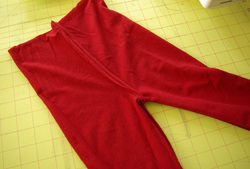 Pull the sleeves apart and you should have something that is starting to look like pants! Haste Makes Waist (wait, what?) 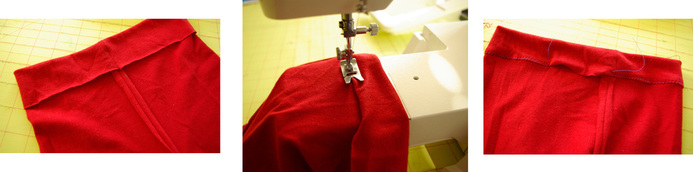 Now, to give those pants a waistband! With the pants still inside out, fold over the top by about 1 1/2". We're going to fold the cut edge under again, just a bit, but I usually do that as I sew. Starting in the back (just because), sew close to the folded under edge with a zigzag stitch, leaving 2-3" unsewn so we can get the elastic in there.  I cut the elastic to the size of the waist of my guide pants plus an inch or so. Fasten your big safety pin to one end of the elastic and insert it into the casement. Keeping the elastic from twisting, scooch (yes, that's a technical term) the pin through the waistband, pulling a bit of the elastic in each time. Don't pull the elastic all the way in though, we still need to sew the elastic to itself. When you have finished, your pants should look like the picture on the right, with elastic coming out each side of your gap in the waistband casement. Remove the safety pin. 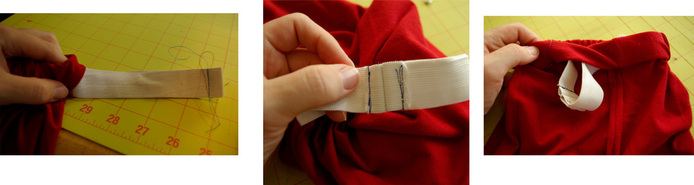 Sew the elastic to itself like so, with a big seam allowance. MAKE SURE IT'S NOT TWISTED BEFORE YOU SEW IT. Then spread the seam allowance and sew it down too. Unbunch the waistband until all the elastic is in the pants and the fabric is uniformly gathered or ungathered. Is That the End? 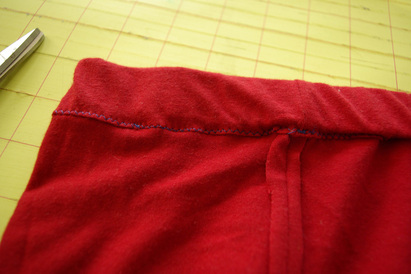 Almost! Carefully fold under the raw edge in your waistband gap and zigzag it, making sure not to sew on the elastic. Overlap stitches with the beginning and end of your previous go at the waistband. Congratulations, You Captain of Pants-Making, You! 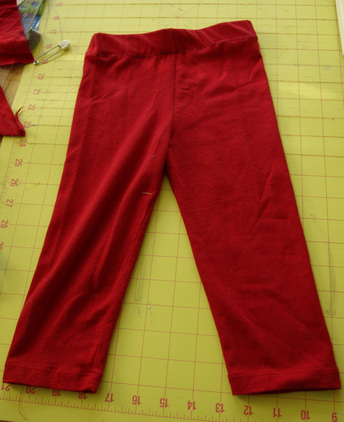 Lo, and behold, the finished product! Let's stick a cute baby in there, shall we? 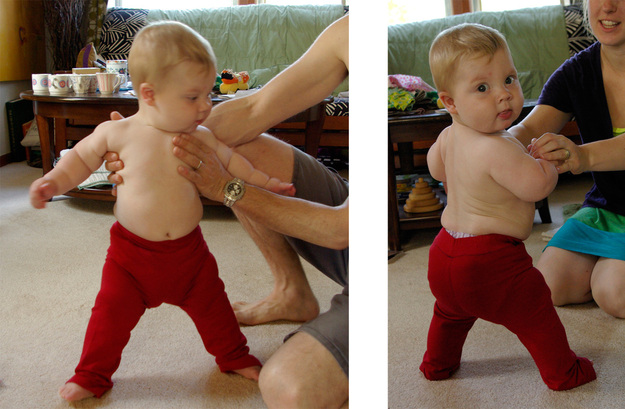 As you can see, they are a little bit long and a little bit snug, in preparation for his slimmer crawling (and ohmygod soon walking) self. Go Forth and Make Pants!
|
Author
My name is Ansley Knoch. I am the creator of Rispok, a line of accessories for big and little people made from repurposed materials. I live in Madison, Wisconsin with my husband, Fred, and our son, also Fred, better known as 5. Archives
June 2013
Categories
All

 |
 RSS Feed
