rispoklife
  • Home
  • About
  • Contact
  • Creating
  • Cooking

How I Do

5/6/2011

1 Comment

 
Today I thought I'd share a bit of my process in making my line of fused plastic accessories. For those of you who only come for the baby pictures, just skip to the bottom.

Background

Fused plastic was the very beginning of Rispok. I wanted to create a line of accessories that were well-designed, affordable, and unexpectedly recycled. I spent over a year and a half developing my process, designing products that were labor-efficient, attractive, and durable, and crafting a professional identity. My full product line has gone through some changes since then, but always with the same goals in mind; well-designed, affordable, and beautiful enough that the recycled aspect is just added value.

Basic Process

Now that I am working on by business several hours a day and taking care of a child 24 hours a day, I've had to change my routine up a bit. A lovely fiber student at Finlandia University does the actual fusing for me, but I'm going to walk you through the whole process.
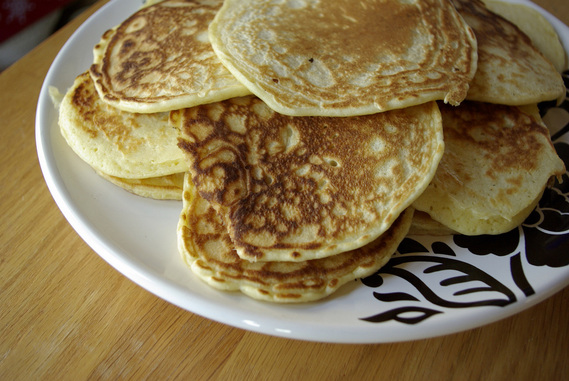
1. Collect a mountain of plastic bags. (It takes a LONG time to figure out which ones work and which ones don't.)
2. Cut off the handles and bottom seam so you have a tube.
Picture
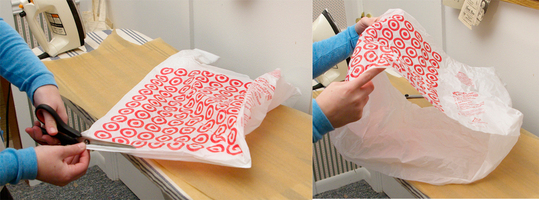
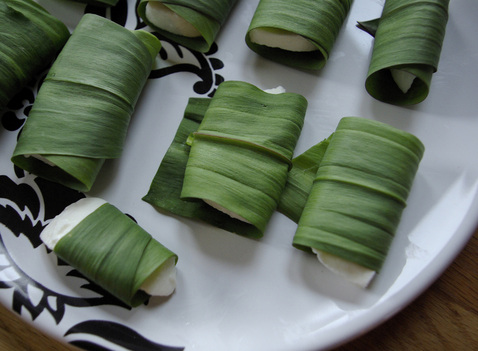
3. Turn bag inside out so the printing doesn't smear.
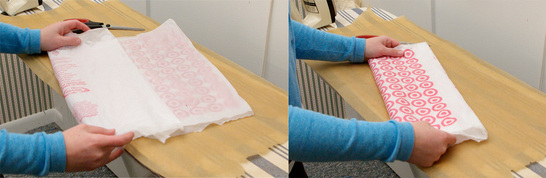
4. Fold bag on thirds, press all the air out.
Picture
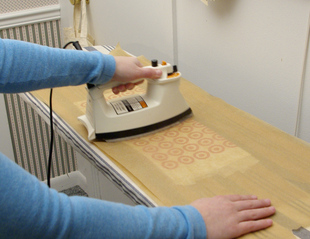
5. Place plastic between two sheets of parchment paper.
Picture
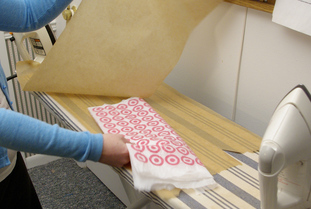
6. Fuse on both sides with iron set on medium heat, moving constantly.
Picture
7. Allow to cool, enjoy result.
Picture
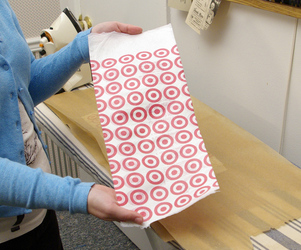
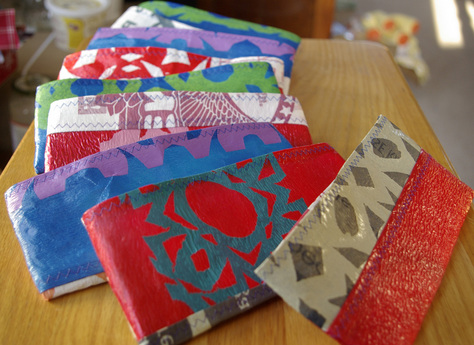
8. I then choose pieces that would benefit from additional color and fuse surface designs to them.
9. Depending on which product I'm working on, I select and order the pieces, sewing long strips together before cutting out pattern pieces.
Picture
Picture
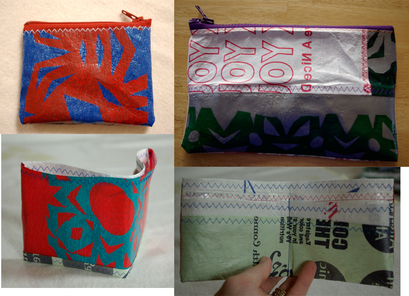
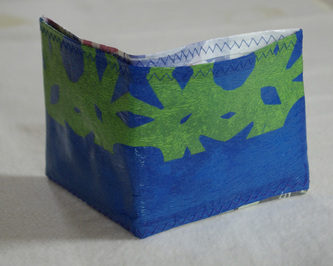
These products and more can be found at the Rispok etsy shop!

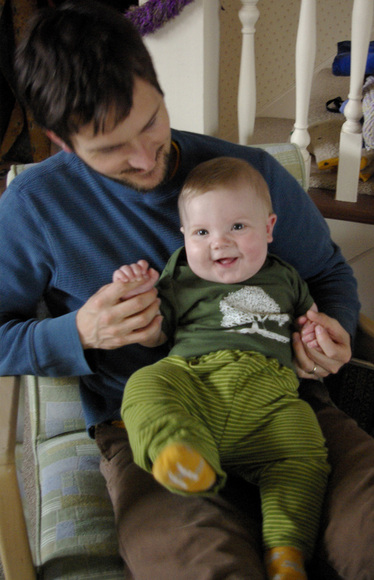
Last but Never Least

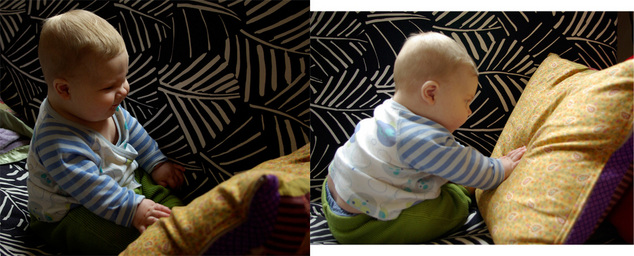
As promised, pics of the little man. Today he decided that this throw pillow was WAY more fun than his mama, so they talked and laughed and had a lovely time, and I got to cut some fabric.
Picture
1 Comment

All New!

5/4/2011

4 Comments


New Product

Picture
They're finally here and ready to roll out! This evening I finished a batch of wallets, hooray! I still have to press the fold in, but that's something I can do with the baby even, so no big deal. Look for them on the Rispok etsy shop starting tomorrow!

New Recipes

Picture
Mexican Lasagna
Oh the saga of the 4 day Mexican lasagna is finally over. On Sunday, I made the refried beans. On Monday, I chopped the veggies, but realized we didn't have any clean casserole dishes. On Tuesday, I made the cilantro sauce and got Fred to wash a casserole dish (did I mention I don't wash dishes by hand? That's my one real housewife caveat). On Wednesday, today, the baby and I finally assembled and baked a super delicious Mexican lasagna (click to go to the recipe). I must say that it was worth the wait.
Picture
Spiced Candied Almonds
My husband is on the board of directors for our local art center. Every few months he comes home and announces that he will be hosting the next art opening and wonders what he should make. This is code for "what do you feel like making, dear?" Don't get me wrong, I do not mind this at all, I like fancy cooking, it just amuses me that he speaks in code...
He is hosting the opening for Derik Spoon, a ceramic/glass artist, tomorrow night. There will be all the usual art opening treats, but Fred thought we needed something sweet, so I made a huge batch of spiced, candied almonds. If you have a bit of patience, and functioning wrists, I encourage you to check out my recipe.

New Faces

Picture
The little man has been adding several new hilarious faces to his repertoire lately, these are but a few. He is my sweet little ham.
At this very moment, the two Freds are playing in a fort on the couch, I think I have to go join them.
4 Comments

Mmmm Delicious Springtime

5/2/2011

6 Comments

 
Well, I was almost ready to finish my post this morning, I wanted to finish one of my nearly done projects so I could include it, but...
The little man has decided that he now sleeps every hour and a half. It must help the teeth come in. So, I got a bit behind on my to do list and then...
I ended up joining the boy in one of his naps. I slept for an hour and it was sooooo lovely. After I woke up I discovered I had a crippling need for PANCAKES!
So simple to fix, you think. Pancakes are easy, right? Not so much for me. I have made pancakes through so many different types of restricted diets (I have even made pancakes with just eggs and almond flour) that I now chronically overthink them. I haven't made a good batch since V was born. Boo.
All was not lost, however. My shining white knight of a husband rode to the rescue! He swooped over to the coop and got some (gasp!) wheat flour and made a beautiful batch of fluffy, buttery PANCAKES!
Now that I have been fortified, I can finish this post!

Pancakes!

Picture

A May Day Repast

Picture
ramp leaves with fresh mozzarella
Spring is probably my favorite time of year for seasonal, local-ish produce. Many of the things I still think of as local are actually more local to my previous Southern Wisconsin residence, but still...
I was at the coop doing the shopping for the week yesterday and saw that the first delivery of ramps was in! If you have never had ramps and you live in a place where you have access to them you must go out right now and get some! Their season is, like, three weeks long and only comes once a year. Ramps are kind of like if an onion and a leek had a wild love child. The bulb-y part is good for sauteing and has a mild onion flavor, but the leaves are the bomb. Really. They are the bomb.
My favorite meal this time of year consists of ramp leaves wrapped around fresh mozzarella bits. That's it. Nothing else. You should try it. Mmmmmm.

New Pants

Picture
I have now made my first foray into baby pants-making. They were mostly successful, a little frumpy at the waist. I didn't need quite as much extra fabric as I thought. Now that he is so big, he will likely fit into the same size pants for a while (just as a different shape). So I thought it was time to make him some pants! I scouted around, read 10 or 15 tutorials, and decided to make the super crazy simplest ones first. These pants could not have been easier.
I took two adult sized shirt sleeves, and made sure they were the same length. I measured the distance from the back of the diaper to the front of the diaper (front and back rise) and divided it in two. I then added one inch, making 9 inches total. I cut down the seam of both sleeves 9 inches and then sewed the two sleeves together along those cuts.
I made a casing for elastic, popped it in there, and I was done! Yay pants!
Now that I have made one pair that was not a disaster, I will make many many more, and probably get a bit wild with it.

Coming Wednesday
New Product and my Mexican Lasagna Recipe!

6 Comments
Forward>>

    Author

    My name is Ansley Knoch. I am the creator of Rispok, a line of accessories for big and little people made from repurposed materials. I live in Madison, Wisconsin with my husband, Fred, and our son, also Fred, better known as 5.

    Archives

    June 2013
    May 2013
    April 2013
    March 2013
    February 2013
    January 2013
    December 2012
    November 2012
    October 2012
    September 2012
    August 2012
    July 2012
    May 2012
    April 2012
    March 2012
    February 2012
    January 2012
    December 2011
    November 2011
    October 2011
    September 2011
    August 2011
    July 2011
    June 2011
    May 2011
    April 2011
    March 2011

    Categories

    All
    52
    Artists
    Breakfast
    Cooking
    Design
    Fall
    Family
    Fashion
    Finnish
    Holiday
    Holidays
    Juggling
    Kcwc
    Music
    Parenting
    Pregnancy
    Printing
    Product
    Projects
    Protest
    Recipes
    Remnants
    Repurposing
    Reuse
    Scandinavian
    Sewing
    Spring
    Studio
    Summer
    Travel
    Tutorials
    Up
    Winter
    Wisconsin

    RSS Feed

    Picture
    Follow Me on Pinterest
    Picture
    my craftgawker gallery
Powered by Create your own unique website with customizable templates.